
Hello...what's up??
I feel awesome when I receive even a single message from my readers about my next post or how I am doing or about anything else. It's all your support and motivation that inspires me to try new new things. DIY projects are my favourite and I know you also love them. This time it's a best out of waste DIY, a dancing Peacock statue made up of Pista shells. Oh yes, you read it right Peacock out of Pista shells.
.....now if I am not wrong, I guess you all also need its tutorial ??? *wink*
Items Required:
1. Pista Shells
2. Clay (I used the clay that is used for pottery. You can use any clay, only thing is that it must be hard enough to hold the peacock.Can also use air dry clay.)
3. A Small Ice Cream Cup
4. Small Round Shaped Rhinestones
5. Fevicryl Acrylic Paint
6. Glue
7. Small Round Shaped Card Board
8. Pencil
9. Paint Brush
10. Scissors
11. A Wire Cutter
12. Some Binding Wire (can get from any hardware store)
13. M-Seal / Hobby Ideas Shilpkar Clay (I used one pack of M-seal of 75gms)
14. Talcum Powder

Step-1
Take a small ice-cream cup or curd cup and fill in the clay in it. Use the cup as a cup mould. Make its surface area smooth.

Step-2
Dust your palms with talcum powder and take equal portions of both the M-seal mixtures. Knead them perfectly until both the mixtures completely mix with each other.

Step-3
Take around a 7-8 cm piece of binding wire and give it a U shape.

Step-4
Now take around 80% of the M-seal mixture and insert the U shaped wire in it. Then slowly start giving the shape of a peacock body.

Step-5
If your M-seal mixture is very wet then it may take a little time to be in shape. Can insert a small piece of wire in the neck portion to keep it in shape and straight. Make the back of the peacock flat, so that it will be easy to stick the feather portion on it. Then keep 5% of the M-seal mixture for making crest of the peacock and then divide the remaining mixture into two equal parts and make two thin strips to make the leg. Length of this strips should be equal to the length of the wire that we have used for leg.

Step-6
Now with the strips cover the wire. Don't cover the whole wire. Leave a small portion as the following picture. Now insert the wire in the clay, that we are using as base. The extra M-seal portion will form the toes of the peacock.

Step-7
Now cut three small pieces of wire and make three small balls. I made the balls slightly bigger than mustard seeds. Then gently insert the wires in it. These we are going to use a crest of the peacock.

Step-8
Now insert the crests and leave it to dry completely. It will take around an hour to get ready. Take a round shaped cardboard. I took a piece of around 10 cm diameter. Mark a line on it, on this portion we will apply glue and will stick on the back.

Step-9
Now apply glue on the card board piece and stick the pista shells. Follow a circular pattern while sticking the shells.

Step-10
Once the card board is covered with pista shells, let it dry. I left it whole night to dry. Then cut the cup in the base and take it out.

Step-11
Now apply primer on each part. I applied white acrylic paint as primer.Once the primer is ready, start painting it.

Step-12
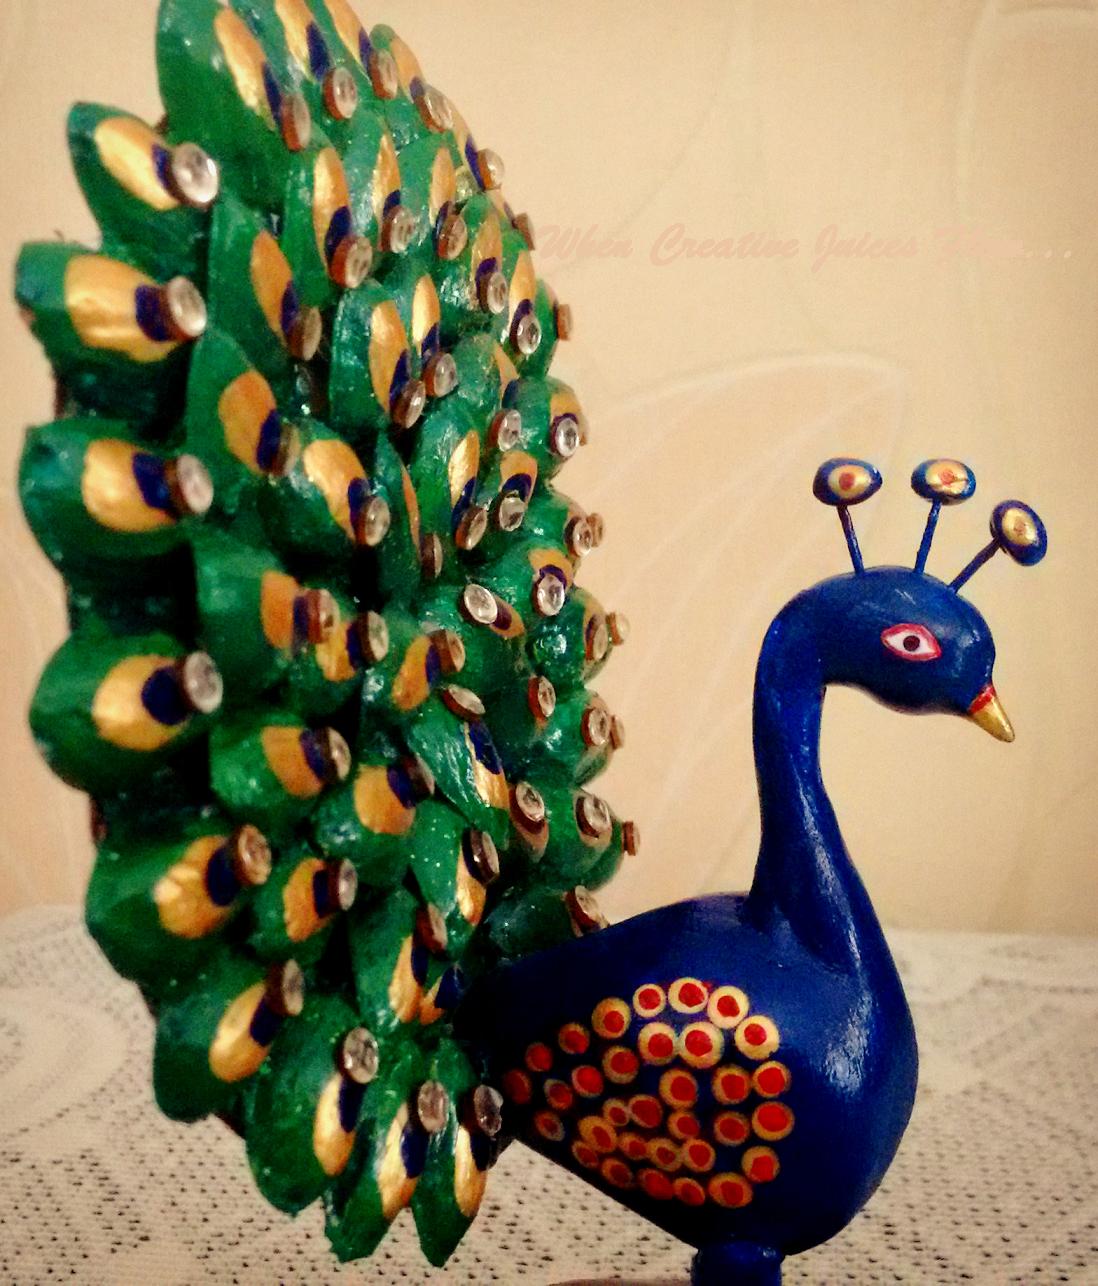
I used blue, green, golden and red colour to paint the peacock. Applied dark brown on the base, to make it look like a wooden one. Then I glued small round shaped rhinestones on each pista shells.

Step-13
Leave the rhinestones to dry for some time. Then apply some glue on the back portion and on the blank portion of the feather cardboard. Stick them together. Keep a support just like the following picture for sometime, so that it will be in place.

Then the dancing peacock made out of pista shells is ready. Have a look on both the sides of the peacock that I have made. Isn't it beautiful. *smile*. I just love it and had no idea that it will look so beautiful.

Very nice work!
ReplyDelete